Hypervisor at the "Edge" - Running pfSense on ESXi as a Home Firewall

A recent requirement came up for a security feature that my existing home router / firewall could not solve so I set about looking for an alternative solution... this post will cover what I now run as the main firewall at home. If you are looking for a firewall that is more "commercial grade", one that is packed with enterprise features but do not want it to cost a fortune then pfSense could well be it!
I decided to run pfSense as a virtual machine as this would provide the easiest protection and roll back functions (snapshots) to cover against any upgrades or configuration changes that do not go according to plan, this way I could be back to a working internet connection in minutes rather than having to worry about BareMetal installs and config backups. Also, by using the community edition of Veeam I would be able to take regular backups of the VM making it super easy to migrate, should I need to swap out the underlying hardware for any reason further down the line.
Choosing the Hardware
Due to location and the fact the firewall would need to be running 24/7 I needed something quiet with low power consumption. I decided to use an Intel NUC for hardware, these are very popular within the VMware Home Lab Community meaning there was already lots of support getting ESXi up and running successfully, and also the awesome USB Native Driver Fling from William Lam & Songtao Zheng would be needed to get the additional NICs up and running.
*The choice to make use of USB to ethernet dongles for 2 of the links was fine for the internet speeds available to where I live, if you have high end fibre connectivity and you want to set this up, you may need to source hardware that has a minimum of 3 on-board 1GB nics to avoid any loss of speed.
Kit List
Intel NUC Kit NUC8i5BEH Barebone, Grey/ Black - Intel Core i5-8259U (I purchased the tall version as I wanted the option to fit an SSD drive, the smaller version will only take an M.2 SSD)
1 x 8GB DDR 2400mhz RAM
1 x 120GB SDD (this can be swapped out for an M.2 SSD if desired, I just used what I had lying around)
2 x Plugable USB to Ethernet Adapter, USB 3.0 to Gigabit Ethernet these were chosen for compatibility with the USB Driver Fling for ESXi, they use the ASIX AX88179 chipset, your mileage may vary with other adapters.
2 x Raspberry Pi’s, one to act as Pi-Hole DNS and the other to offer out Guest Wifi using RaspAP*
*I ended up having to use a Pi v4 for the Guest Wifi as the USB to eth adapter didn’t seem to work with the 100Mb nic speed on older Pi’s. Once it was connected to the 1Gb link on the Pi 4 all worked as expected.
Design / Network Map
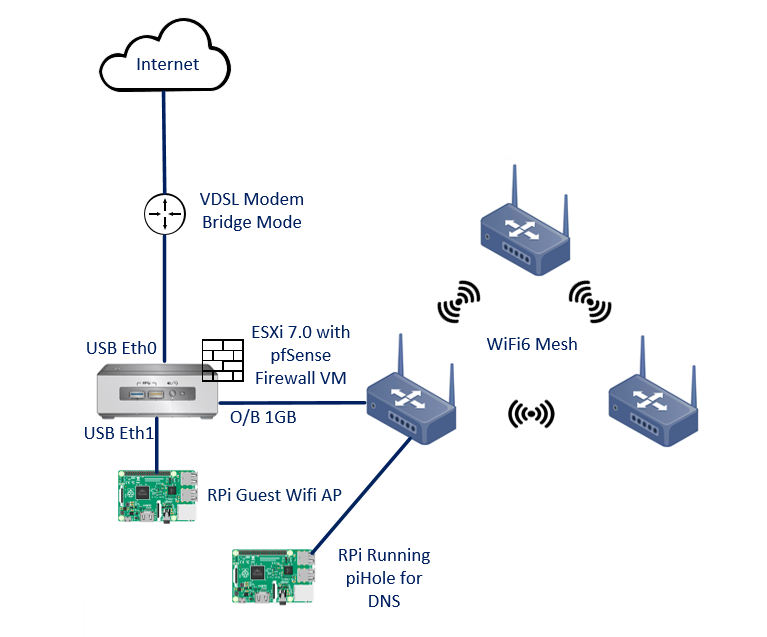
Configuring ESXi
After the default install of ESXi the next step was to install the USB native driver fling, the steps to do this are detailed Here
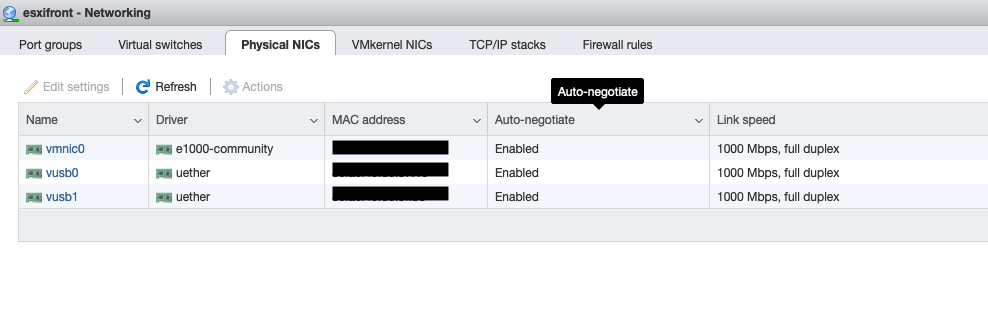
A check of the physical nic status within the web GUI showed all was well
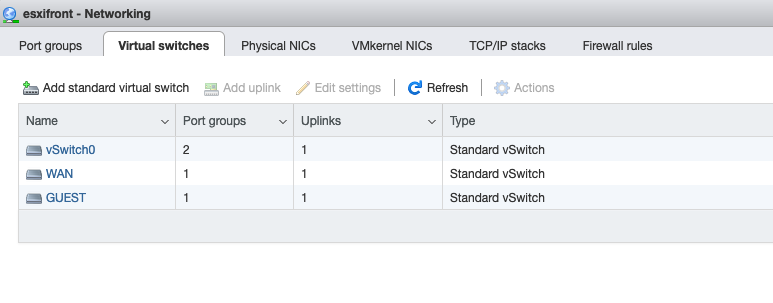
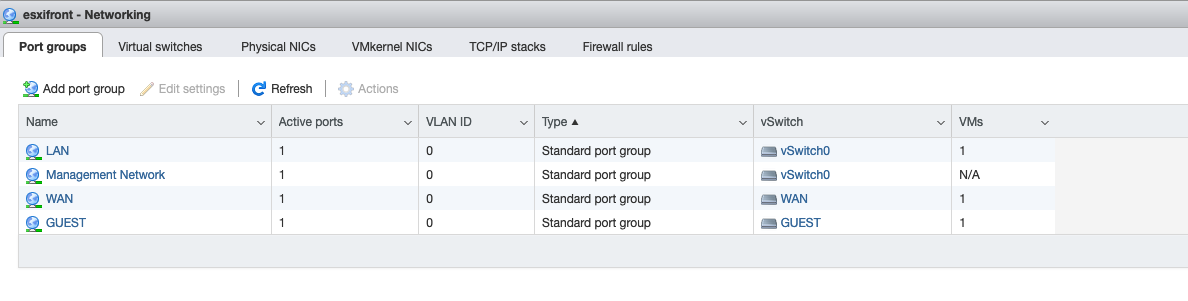
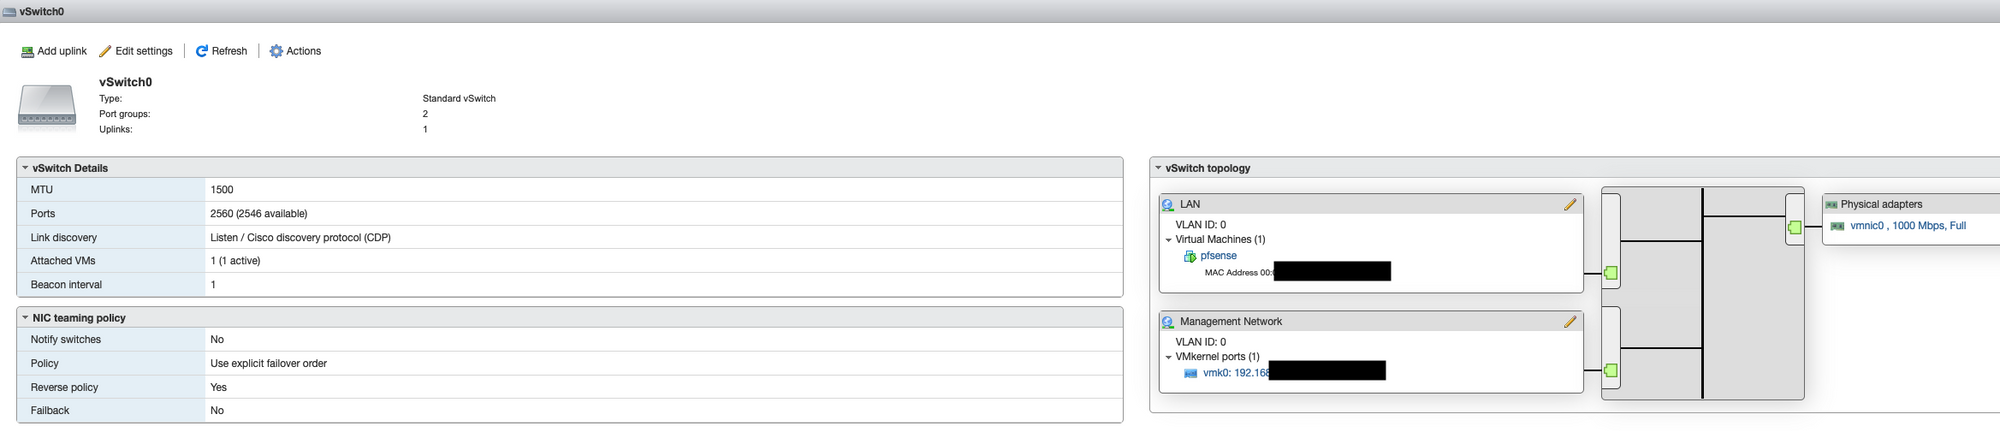
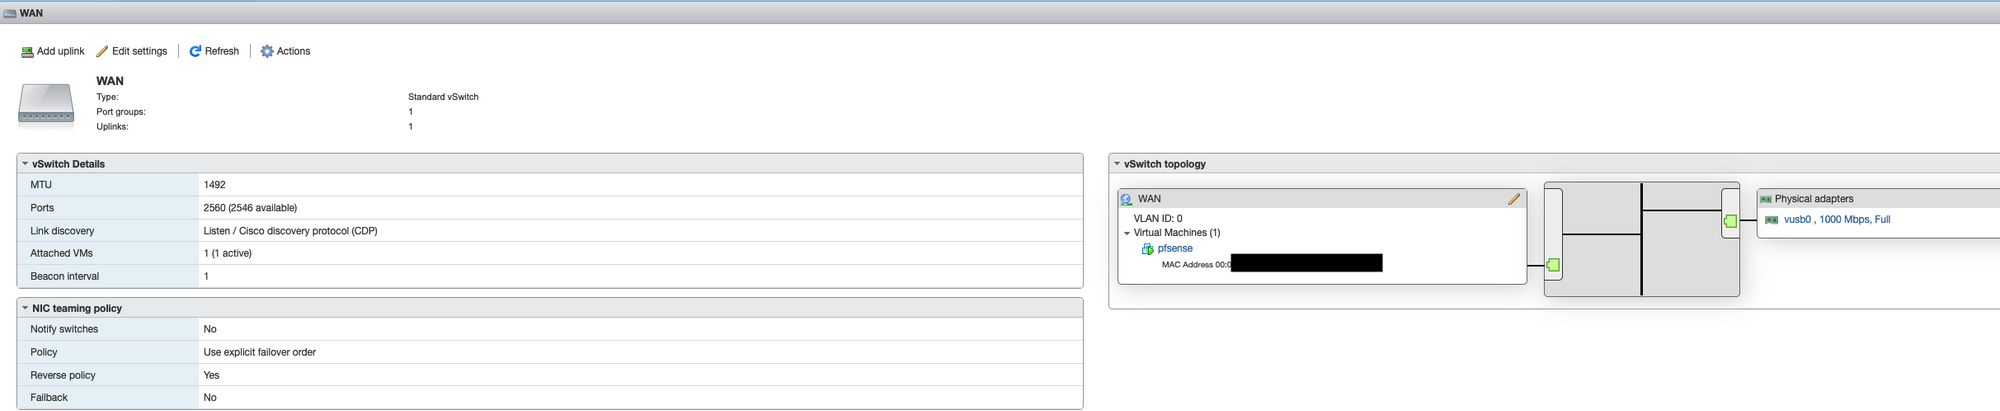
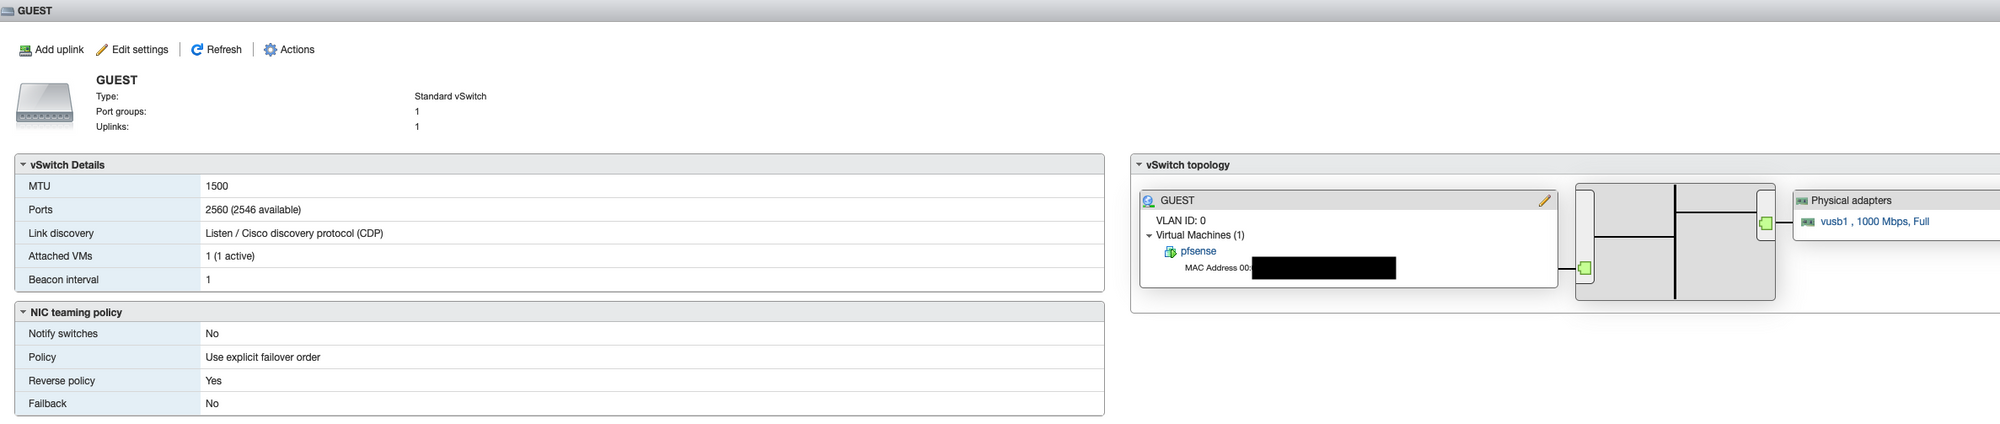
Next, I laid out the virtual switches and port groups, the onboard vmnic0 was used for the internal LAN side and ESXi management. The slower USB dongles were used for WAN side (my internet connection is nowhere near fast enough to stress the USB ethernet adapter) and the less critical Guest network.
Configuring the pfSense Virtual Machine
To deploy the pfSense virtual machine you will need to create a new virtual machine, download and attach the latest pfSense ISO and power on.
The comprehensive install guide outlining the install process and above ESXi network configuration can be found Here
Once completed the network configuration on the ESXi should look something like this...
I then set about configuring pfSense, I won’t go into full detail on my specific settings, there are however a few important ones needed to get things going...
Set the pfSense Admin GUI to only use HTTPS (if not done already) and set a solid password
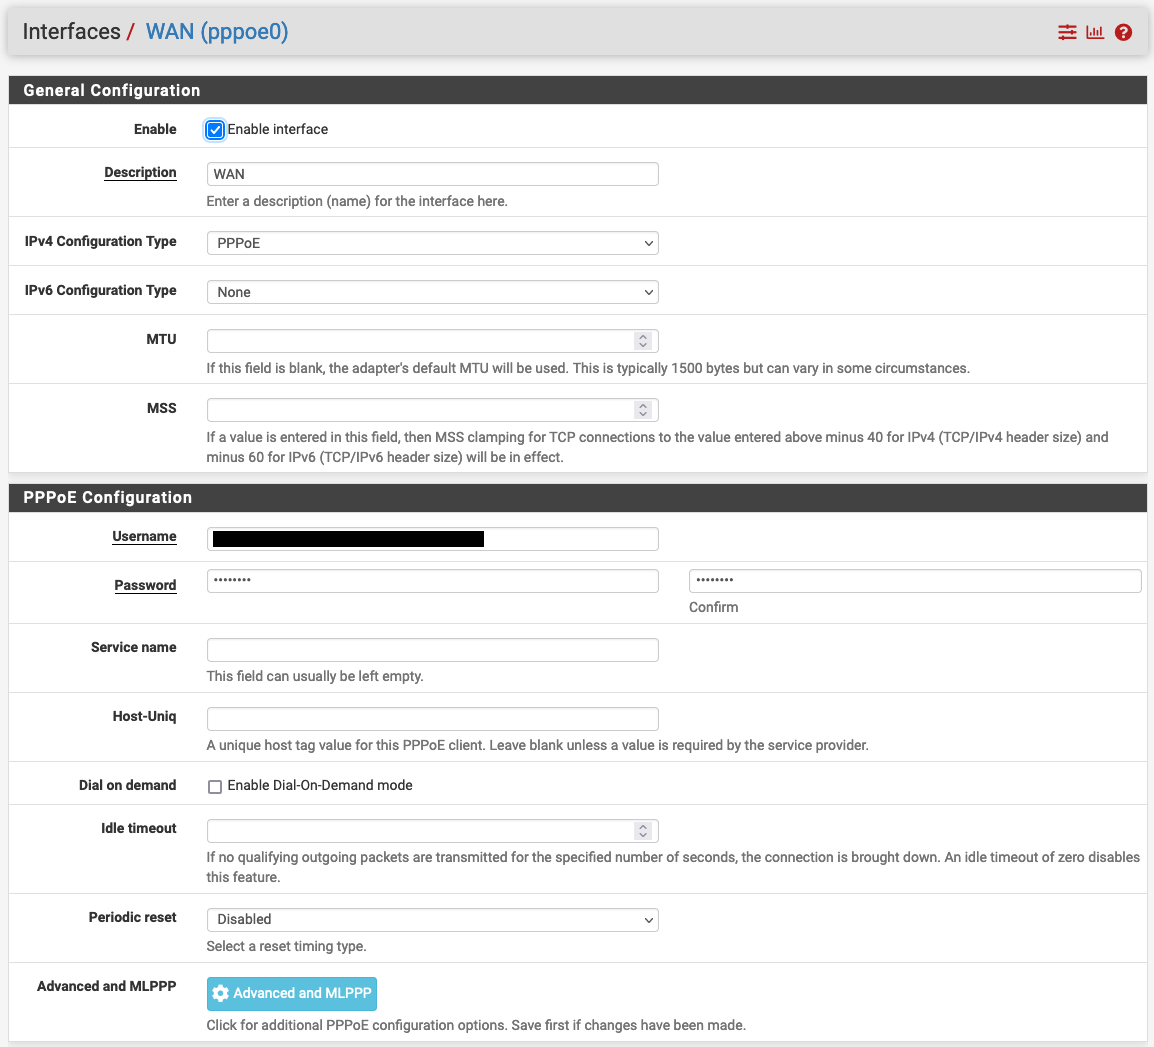
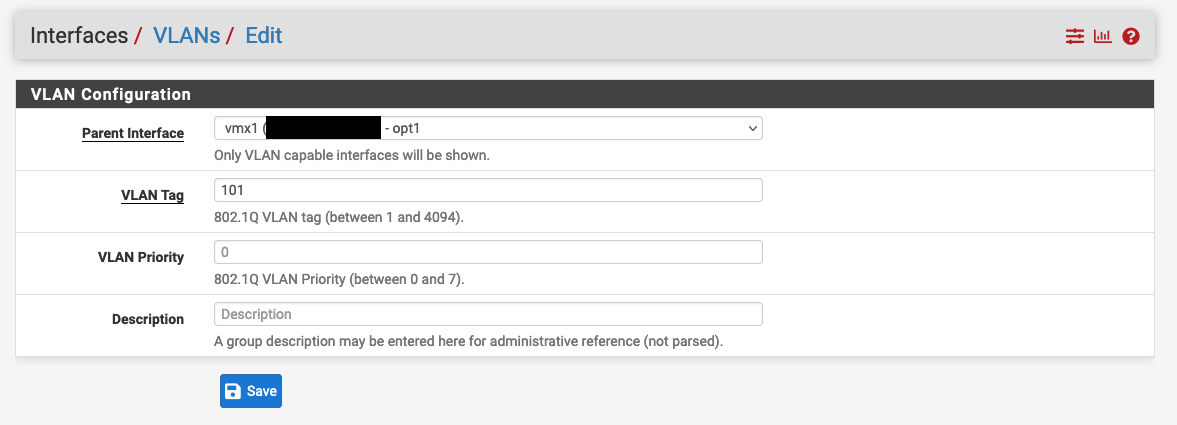
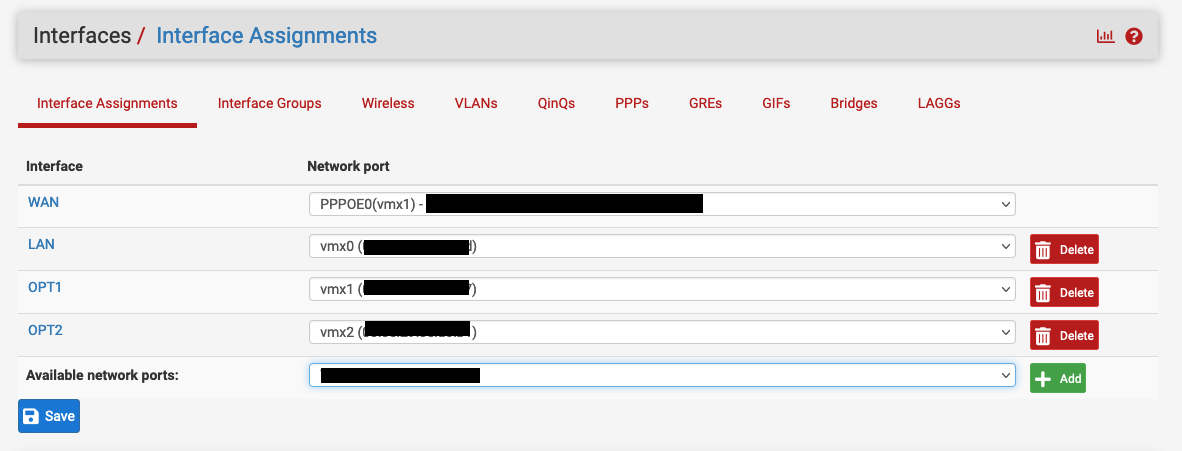
Set up the WAN interface for upstream connectivity, PPPoE in my case, settings for this can vary, I had to ask for the login details from my broadband provider and also had to create and assign VLAN101 to the interface
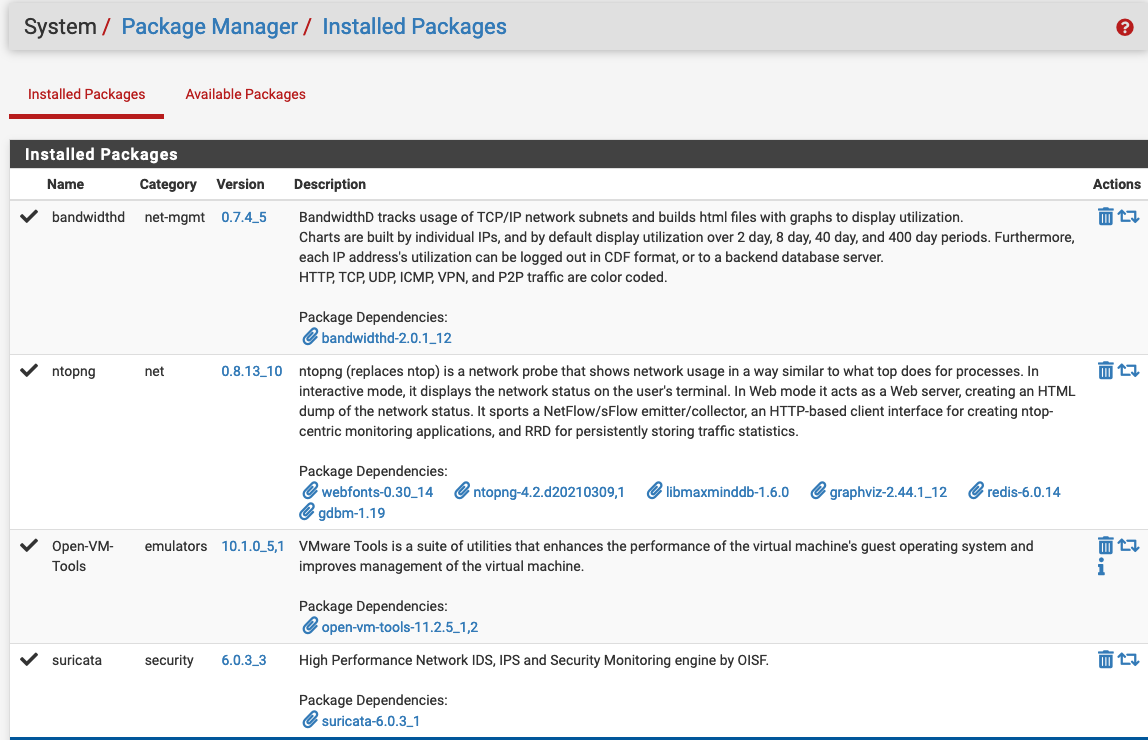
Install Open VM Tools via the Admin GUI Package Manager, I also installed BandwidthD for traffic stats, ntoping to monitor traffic flows and Suricata to give IDS/IPS ability.
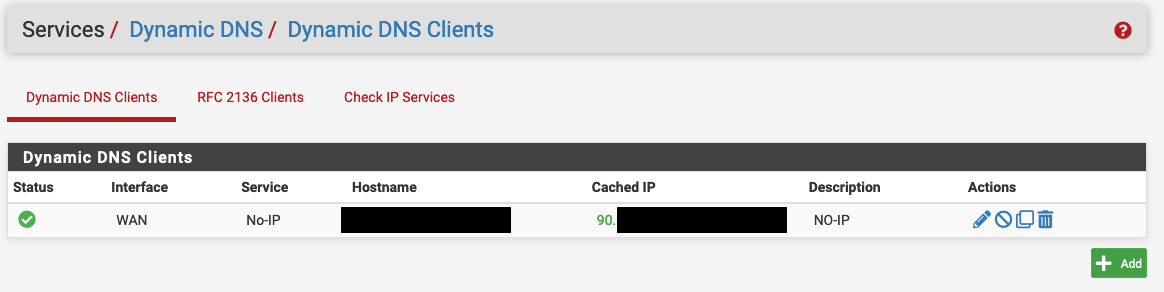
Set up Dynamic DNS if required
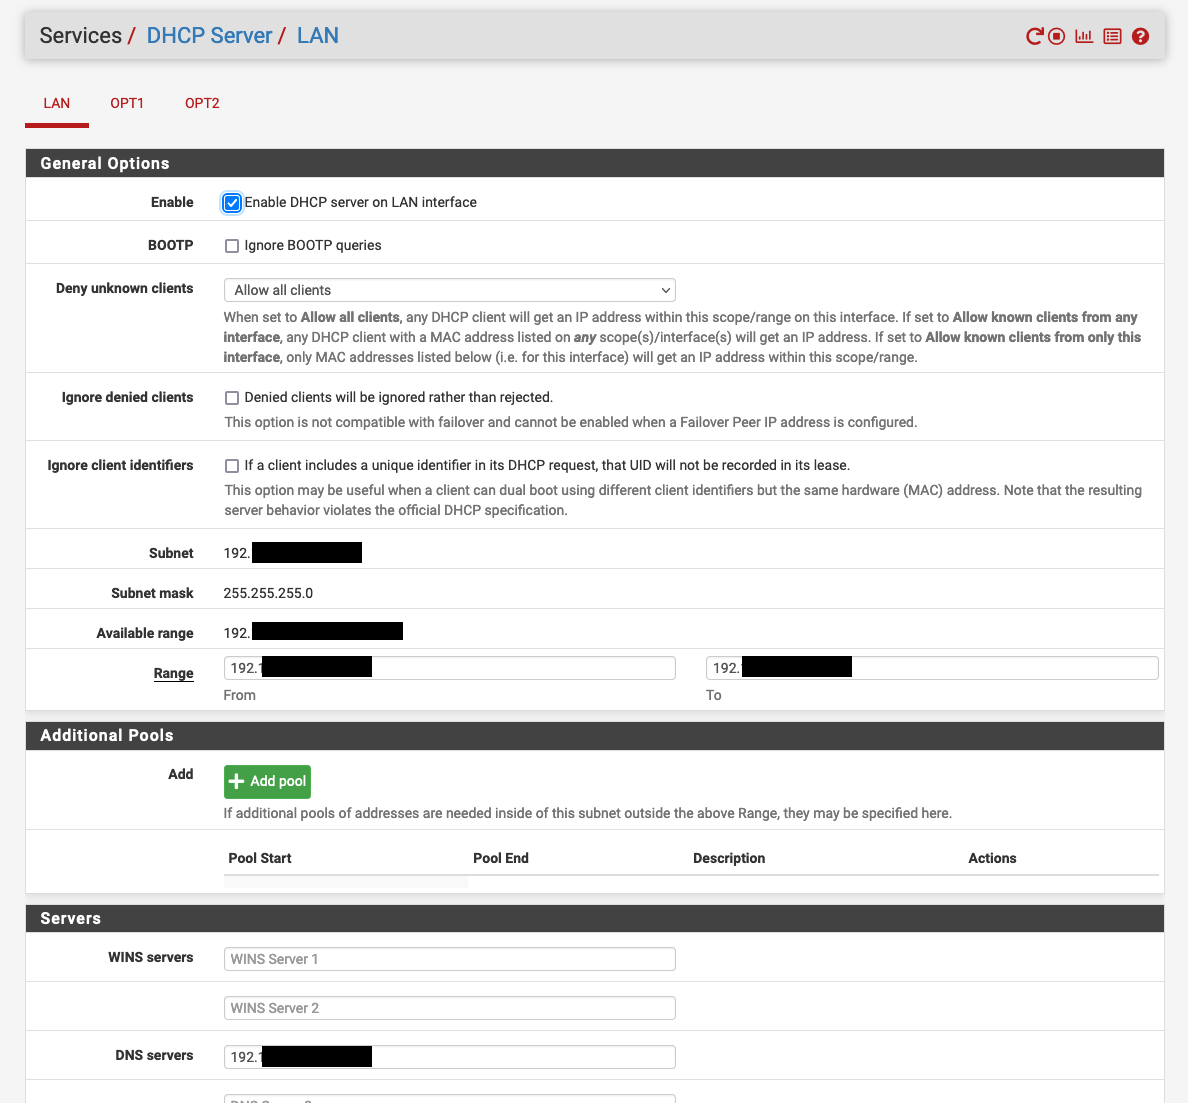
Configure DHCP Server on the LAN interface, ensure you set the DNS issued to use the PiHole IP address.
Other items that I have configured but not detailed….
- Outbound NAT on separate interface on the WAN side to access mgmt page of the upstream broadband modem.
- Dedicated Blacklist rule for specific Ips
- Grouped and throttled specific IoT devices on upload
- Configured upload queuing algorithm to combat “bufferbloat” on vdsl connection
Using a Raspberry Pi with piHole for DNS
I run a Raspberry Pi with piHole to handle all my DNS queries, Setting this up warrants a whole post of its own, I used the great post by Nick Kavadias when setting mine up.
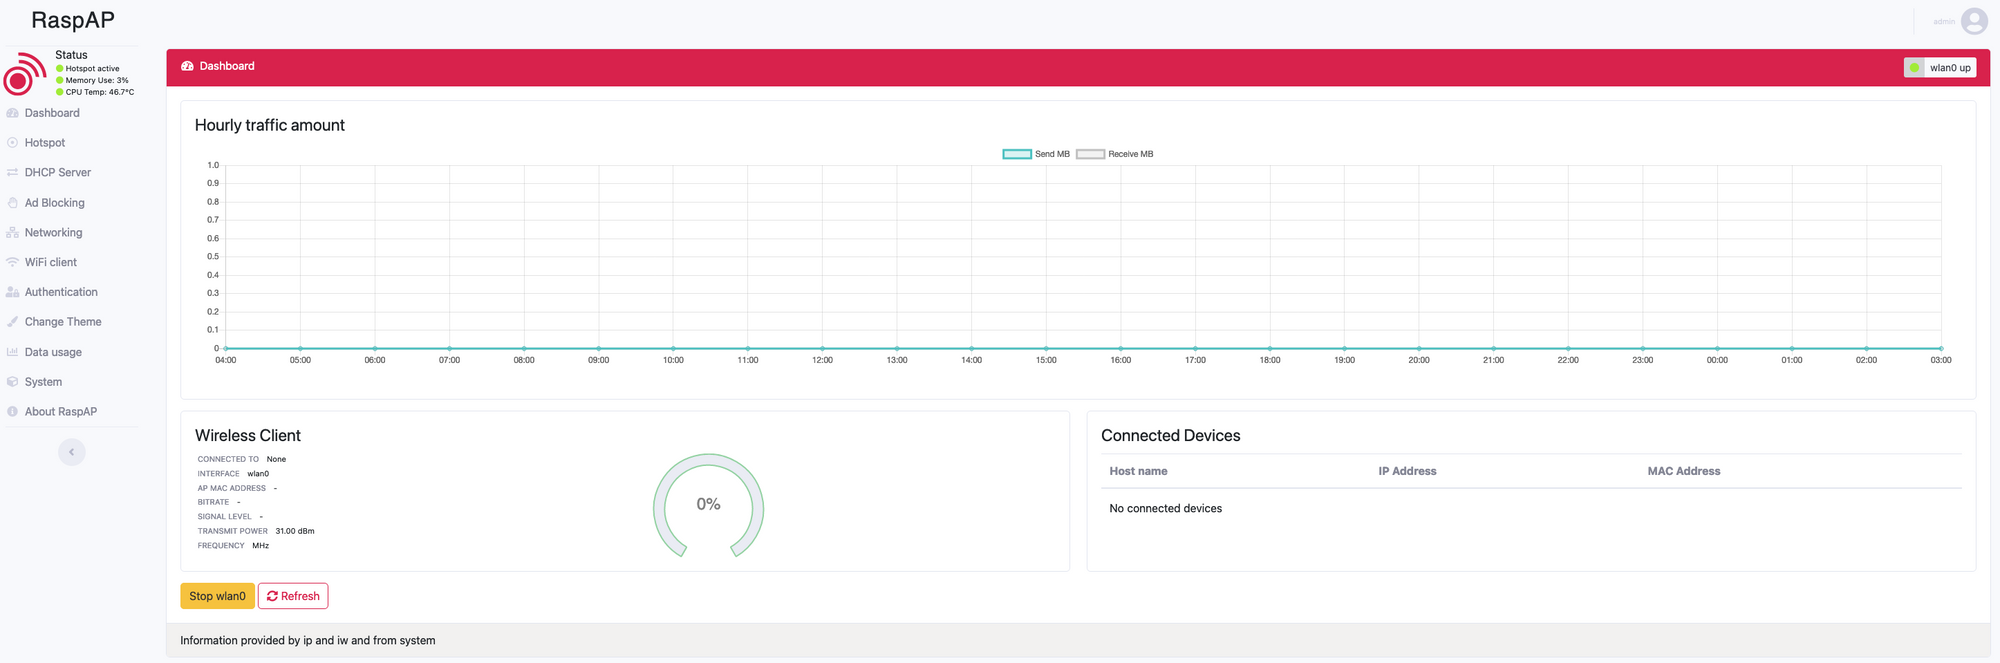
Set up a Guest Wifi AP using RaspAP
This was an easy one to configure and get working, it allows for guest traffic to use the dedicated third link into the pfSense firewall and keeps all guest traffic well away from the local LAN.
To set this up I used a Raspberry Pi 4 with 4GB of RAM, you could probably get away with the 2GB version for this, the main reason for using a Pi 4 was down to the compatibility issues I ran in to with the usb > eth dongle and auto negotiation down to 100MB.
To install RaspAP I followed the Quick Start guide Here, once installed more specific configuration of the AP can be carried out via the web interface.
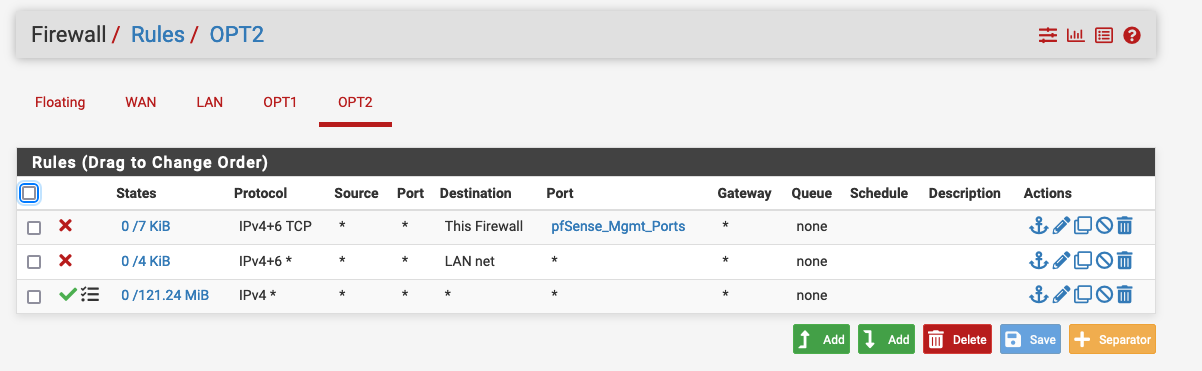
I then added the following rules on the pfSense Firewall to isolate all devices connected to the AP providing internet access only, and a second rule blocking access to the pfSense Admin page over this secondary interface.
If you managed to get this far, Thank you for Reading!
If you have any questions feel free to comment below or reach out on Twitter.